
How to install Iris Shaders depends on your Minecraft version and the mod loader you plan to use. Iris provides a simple installer that can set up the mod with Sodium, while experienced users can also install the required files manually through supported mod platforms.
Once Iris is installed, you can add compatible shader packs and enable them from Minecraft’s video settings. This guide explains the full process, from preparing your game to troubleshooting common installation problems.
What You Need Before Installing Iris Shaders
Before you start, check your Minecraft installation and make sure you are working with Minecraft: Java Edition. Iris is designed for the Java version rather than Minecraft Bedrock Edition. You should also know your Minecraft version. Iris releases are tied to specific Minecraft versions, so downloading a file for the wrong version can prevent the game from launching.
If you have not downloaded Iris yet, start with the Iris Shaders Download page. It explains the available download methods, including the official installer, Universal JAR, Modrinth, and CurseForge options. You should also close Minecraft and the Minecraft Launcher before running an installer. This helps prevent files from being locked while the installation process runs.
Check Your Minecraft Version
Open the Minecraft Launcher and check the version you normally use. For example, you may be using a 1.21.x release or one of the newer 26.x releases. Select an Iris version that supports the same Minecraft version.
Do not assume that the newest Iris release works with every Minecraft release. Always check the compatibility information for the specific version you want to use.
Check Your Mod Loader
Iris supports supported mod-loader environments such as Fabric and NeoForge, depending on the Minecraft version and Iris release. Fabric remains a common setup for Iris because it works well with Sodium and other performance-focused mods.
NeoForge support also exists for supported Minecraft versions, but the available Iris release can differ from the Fabric version. If you use a different mod loader, check the current Iris release information before installing anything.
How to Install Iris Shaders With the Iris Installer
The easiest way to install Iris is usually the official Iris Installer. The installer can set up Iris and Sodium together, reducing the number of manual steps you need to complete.
Download the Iris Installer
Visit the official Iris download source and choose the installer that matches your computer. The available installer options include a Windows executable and a Universal JAR. The Windows option is convenient for Windows users, while the Universal JAR provides a more general installation method.
Download the file and wait for it to finish before opening it.
Open the Installer
Run the Iris Installer after downloading it. The installer provides the options needed to create an Iris installation for Minecraft. Select the Minecraft version you want to use and review the available installation settings. Make sure the selected version matches the Minecraft version you plan to launch.
Install Iris and Sodium
Continue through the installer and allow it to create the required Minecraft profile. The installer can install Iris together with Sodium. This setup gives you the shader functionality provided by Iris while also using Sodium as the rendering and performance component. Once the installation finishes, close the installer.
Launch Minecraft With Iris
Open the Minecraft Launcher again and look for the new Iris installation or profile. Select it and start Minecraft. If everything matches correctly, Minecraft should launch with Iris installed. You can then open the video settings and look for the shader-related options.
If Minecraft crashes before reaching the main menu, check your Minecraft version, Java setup, mod loader, and other installed mods. A mismatch between these components can stop the game from starting.
How to Install Iris Shaders With Fabric
Fabric provides another way to use Iris when you prefer managing your Minecraft mods yourself. First, install a Fabric profile that matches your Minecraft version. Then obtain the appropriate Iris file and the required dependencies for that release.
Place the required mod files in your Minecraft mods folder. Make sure every file targets the same Minecraft version. A Fabric installation can fail when one mod targets a different release.
Add Iris to the Mods Folder
On a standard Minecraft installation, the mods folder is located inside your Minecraft directory. Place the Iris file and its required compatible dependencies inside this folder.
Do not place shader packs in the mods folder. Shader packs use a different location and can be added after Iris launches successfully. Start Minecraft with the Fabric profile after adding the files. If the game reaches the main menu without errors, open the video settings and check whether Iris is active.
How to Install Iris Shaders With NeoForge
Iris also supports NeoForge for certain Minecraft versions. The process is similar to a manual Fabric installation, but you must download a NeoForge-compatible Iris release. Do not use a Fabric build with a NeoForge installation.
Install the correct NeoForge version first. Then add the compatible Iris files according to the release requirements. Because Iris support can vary between Minecraft versions and mod loaders, check the specific release before installing it.
This matters most when you are working with newer Minecraft versions where the available Fabric and NeoForge builds may not have identical version numbers.
How to Add Shader Packs to Iris
Installing Iris does not automatically mean that you have a shader pack enabled. After Iris launches correctly, you can add a shader pack separately.
If you are looking for compatible options, our Iris Compatible Shaders guide will explain which shader packs work with Iris and how to identify compatibility before installing a pack.
Open the Shader Pack Menu
Launch Minecraft with Iris enabled and open the video settings. Look for the shader or shader-pack option provided by Iris. Open the shader pack menu and locate the option for adding or opening the shader pack folder. This folder is separate from the Minecraft mods folder.
Add Your Shader Pack
Download a shader pack that supports Iris and place its shader-pack file in the appropriate shaderpacks folder. In most cases, you should keep the shader pack in its original archive format rather than extracting every file manually. Return to Minecraft and open the shader selection menu. The newly added pack should appear in the available list.
How to Enable Shaders With Iris
After adding a shader pack, select it from the shader menu. Minecraft may take a moment to load the shader. The first launch can also take longer while the game prepares the required rendering resources.
Once the pack loads, return to your Minecraft world and check the result. You can change shader settings from the pack’s configuration menu when those options are available.
If you want to compare different visual styles, the Best Shaders for Iris guide can help you understand the differences between lightweight, balanced, realistic, and high-end shader options.
How to Use Iris Shaders
Using Iris after installation is straightforward. Start Minecraft through your Iris profile, open the shader settings, and select the shader pack you want to use.
You can switch between shader packs whenever you want. You can also disable shaders when you need higher frame rates or prefer Minecraft’s standard rendering.
Adjust Shader Settings
Many shader packs provide their own settings.
These options can change effects such as:
Higher-quality settings can require more GPU resources. If your frame rate drops, reduce demanding effects before changing your entire Minecraft setup.
Iris Shaders and Sodium
Iris and Sodium often appear together because the Iris Installer can install both components. The Iris handles shader support, while Sodium provides an optimized rendering foundation. Together, they can create a shader-focused Minecraft setup without relying on OptiFine.
You do not need to manually install Sodium when using the official Iris Installer if the installer provides the required setup for your selected version.
Common Iris Shaders Installation Problems
Even when the installation process is simple, compatibility problems can occur.
Iris Shaders Will Not Install
If the installer does not work, first check the Minecraft version and the installer version. Also make sure Minecraft is installed correctly and that you are using the appropriate installer for your operating system. If you use a manual installation, check that every required file matches the same Minecraft version.
Minecraft Crashes After Installation
A crash can happen when Iris conflicts with another mod or when the wrong version is installed. Remove recently added mods and test the Iris installation again. You can also create a clean profile with only the required Iris components. This makes it easier to identify whether another mod causes the problem.
Shader Pack Does Not Appear
If Iris launches but your shader does not appear, check where you placed the shader pack. The shader file belongs in the shaderpacks folder rather than the mods folder. Also check whether the shader supports your Minecraft and Iris setup.
Shader Causes Low FPS
Shaders can place a significant load on your GPU. Start with lower-quality settings and reduce demanding effects. You can also try a lightweight shader pack instead of a high-end pack. Your hardware, render distance, resolution, and other Minecraft settings can also affect performance.
Iris Shows a Version Error
A version error usually means that one or more components do not match. Check your Minecraft version first. Then verify the Iris release, mod loader, and other required mods. Do not mix files from different Minecraft releases unless the specific mod documentation confirms compatibility.
How to Install Shaders With Iris
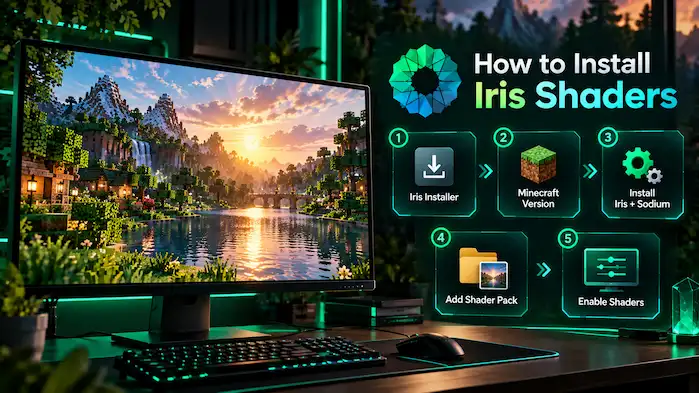
The complete process can be reduced to a few steps:
Once the pack loads correctly, you can use Iris to switch between shader packs or disable them whenever necessary.
Iris Shaders Installation Checklist
Before launching your world, check these points:
Following this checklist can prevent many common installation errors.
FAQs
How to install Iris Shaders?
Use the official Iris Installer or a compatible manual mod-loader setup. Select a matching Minecraft version, install Iris, launch the correct profile, and then add a compatible shader pack.
How to install Iris Shaders Minecraft?
Install the correct Iris version for your Minecraft Java Edition release, launch the Iris profile, and add your preferred shader pack through the shader settings.
How to use Iris Shaders?
Launch Minecraft through the Iris profile, open the shader settings, select a shader pack, and adjust its available configuration options.
How to install shaders with Iris?
Install Iris first, launch Minecraft, open the shader-pack menu, place a compatible pack in the shaderpacks folder, and select it from the available list.
Is Iris Shaders client side?
Iris is used on the client side for rendering shaders. A server does not normally need Iris installed simply because a player uses shaders.
Start Using Iris Shaders
Once the installation works, the next step is choosing the right shader pack for your setup. Different packs can produce very different results, from lightweight visual improvements to demanding realistic effects.